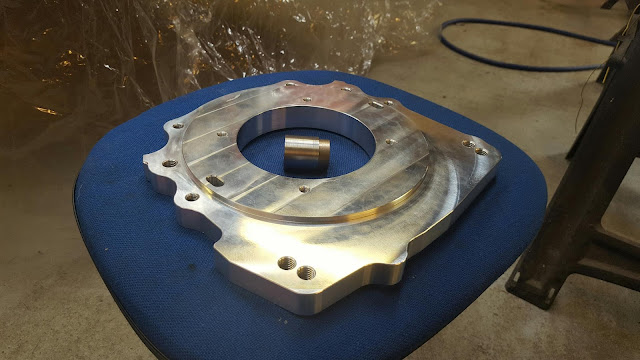
So I finally received my adapter plate & pilot bearing reducing sleeve (SWR Motorsport) and clutch & flywheel (TTV Racing) so I could bolt the two together.
I had trouble getting accurate readings while clocking the bellhousing however the gearbox did slide on easily. Even though, I've ordered another DTI so will likely do it again just to be sure.
There's a lot of bolt on, bolt off activity to set this all up but I got there eventually. The bearing sleeve was used as the TKO pilot bush was too small for the 1UZ crankshaft, it's a tight fit so was put in the freezer the night before and then fitted with a dab of Loctite 272 in to the end of the crank. The pilot bush just slots inside this.
Next the flywheel was bolted on with new ARP bolts and torqued up as per ARPs instructions. The clutch pressure plate, bell housing and adapter plate were temporarily installed so I could measure the distance from the gearbox mating face to the pressure plate fingers. This measurement was then used to set the adjustment of the Tilton hydraulic release bearing.
Next the bellhousing came of, pressure plate removed and bellhousing refitted complete with adapter so I could clock it in. The opening in the adapter is quite small so I struggled to get the DTI lined up properly so I will probably have to repeat this step once I get a different DTI.
With the bellhousing back off again I could assemble and align the clutch. My alignment tool needed a few wraps of tape to get the right fit but was pretty straightforward.
The bellhousing was then bolted to the gearbox and the clutch release was slid over the input shaft bearing retainer. This release bearing requires one of the bearing retainer bolts to be replaced with a pin which stop the bearing from spinning. The release bearing position can be adjust by screwing it in or out on its own sleeve. There are two hoses which need to exit the bellhousing so holes were drilled foe these, although they may have ended up too close to the exhaust!
With a bit of graphite grease applied to the splines, I could now mate the engine and gearbox together. The engine was on the hoist and the gearbox on its stand (old office chair) so a sexond pair of hands was needed to keep everything steady but it all slid together remarkably easily.
I will be taking the assembly up to GD at the beginning of April so they can make up the engine mounts with a view to hopefully picking up the chassis at the GD open day on 20th May, fingers crossed.


