| Old 4 man tunnel tent is a perfect fit for a Cobra! |
| Chassis is only about 75kg so easily goes on the roof (didn't do much for my fuel economy though!) |
| Thankfully I have a large estate car |
| Front suspension components |
| Rear suspension components |
| Old 4 man tunnel tent is a perfect fit for a Cobra! |
| Chassis is only about 75kg so easily goes on the roof (didn't do much for my fuel economy though!) |
| Thankfully I have a large estate car |
| Front suspension components |
| Rear suspension components |
I had been putting off the side repeaters as I couldn't decide which ones to fit until seeing some LED ones on the GD stand at Stoneleigh. They come with a black rubber grommet and optional chrome surround and I managed to pick them up at the show from CBS.
Fitting these is very straightforward once you've decided where you want them. Some people place them towards the rear above the louvres but I chose to put mine further forward.
I placed 25mm wide masking tape along the top and forward edges of the louvre opening, then another strip above and one behind. Where the tapes overlap creates a diamond shape above and inline with the forward edge of the opening.
Drawing a cross to join the opposing corners of this diamond gave me a centre point to drill a 20mm hole. Once the edges are cleaning up the side repeater just pushes in. I've order some two pin Econoseal plugs which I'll install later.
Repeat for the other side, all in about 20 mins work.
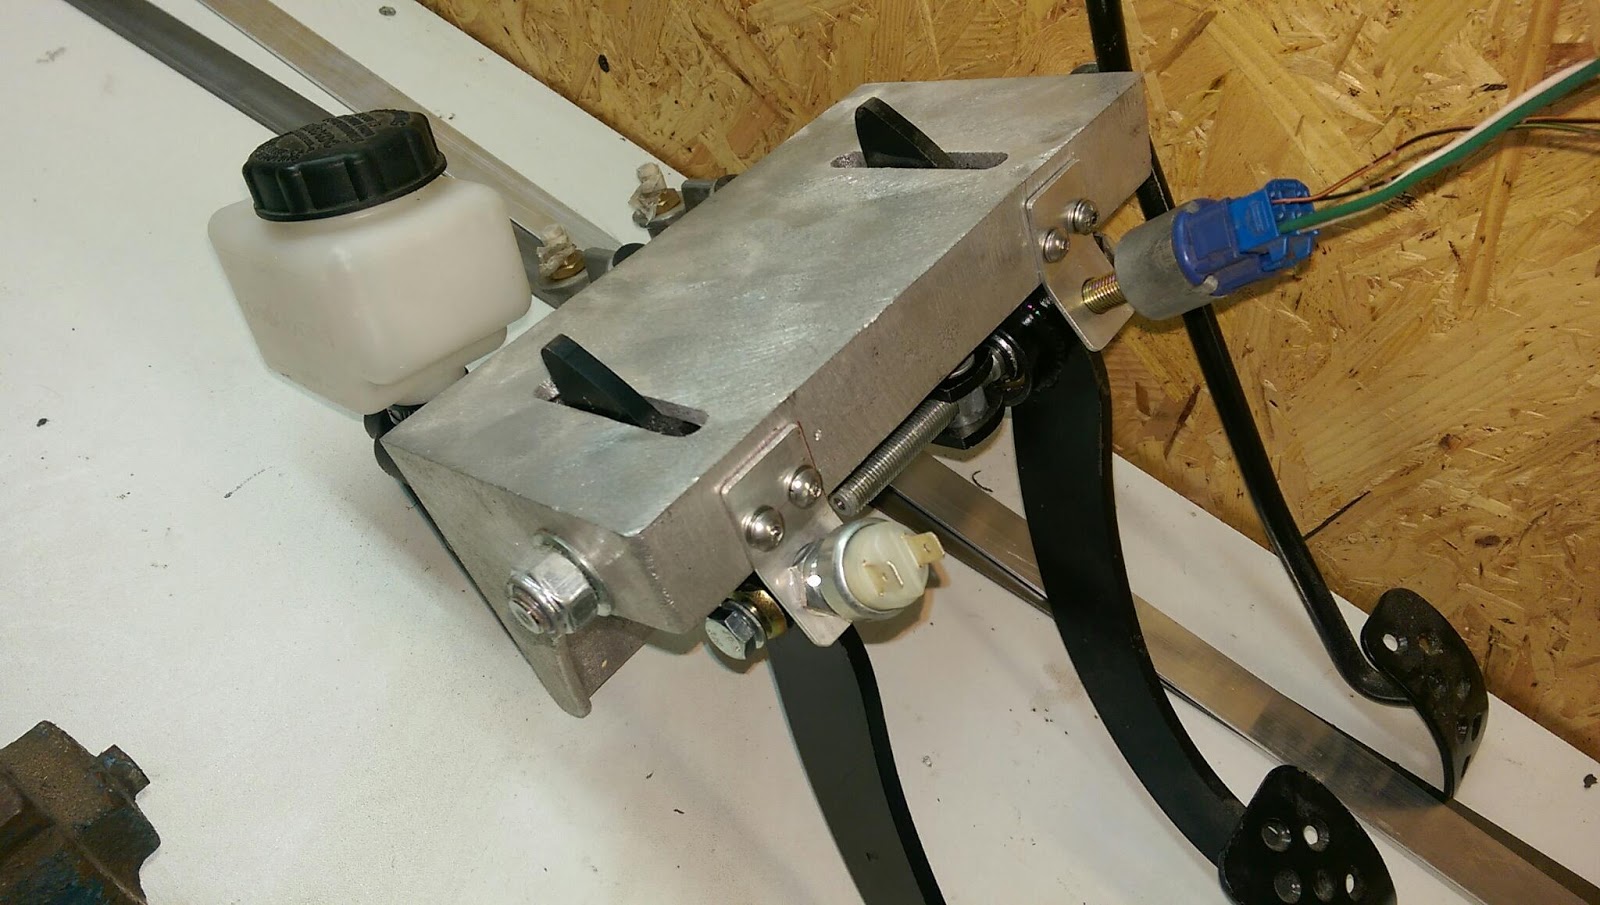
I had forgotten to install the brake light switch when I installed the pedal box, so that was removed again. Not an easy job on your own unless you have 'go go gadget arms'!
As I'm using the Lexus engine and intend to utilise the cruise control, I kept the swith from the donor. This switch has 4 wires, two for the brake lights and the other two for the cruise control.
I created a small bracket out of 25mm x 2mm flat aluminium bar with a slight bend in the middle to position the switch at the correct angle. I then drilled and tapped the pedal box and bolted it on with M5 button heads and spring washers.
I've also installed a second switch on the clutch pedal which will stop the starter operating unless the clutch is depressed, thus never accidentally starting it in gear.
My wife and I have recently had a baby so the last few months have seen little progress, however this weekend they both went away which gave me a chance to reacquaint myself with the car.
It had gathered a lot of dust and grime over time so the first order of the day was to give it a good clean.
I've had the windscreen frame back from the powder coaters for months now, but have been putting of reassembling it, until now.
The glass has been shifted around the garage wrapped in an old duvet and it's only a matter of time before it gets broken, so I decided it was about time to refit it in the frame.
This was not a task I was looking forward to, and that trepidation was for good reason. Unfortunately; due to my intense concentration, I forgot to take any pictures of the process but the general idea is this:
1. Refit the lower frame first
2. Start in the centre and work outwards gradually
3. Use washing up liquid liberally between the seal and frame
4. Take your time. I ended up doing it three or four times before getting it right
5. Find something soft to work on. I used an old foam mattress
There are two main challenges, the first being the fact that the frame and glass aren't exactly the same shape so careful manipulation is necessary.
The second; and most frustrating, is that the seal isn't a 'U' shape buy instead it is flat. This means that you need to simultaneously fold it over the glass, press it in to the frame and stretch is slightly so the corners meet. All this whilst trying not to break the glass and being covered in washing up liquid!
Ideally a second pair of hands would be useful, however after much cursing and nervous sweating I eventually managed to piece it all together without major incident.
I think it looks great along with all the other matte black 'chrome'
I've actually had two Cobra builds underway, one a GD and the other a lesser known Fujimi RS-5 427. The latter is generally a quicker build and only took a couple of months!
Now that the engine and gearbox have been coupled together it was time to deliver it to GD, they need it in order to fabricate the mounts for the chassis.
The 20th May was the GD open day at their new premises in Grantham so I seized the opportunity and loaded the powertrain in to a borrowed trailer and headed up.
It was a great turnout and fabulous day despite the heavy downpours and the engine was unloaded without issue. I was pleasantly surprised to find most people very interested in my choices rather than the shunning I was expecting for not using an American V8!
I still have to reconnect the loom to the various ECU plugs but that can be done when I get it back along with the chassis, hopefully in a couple of months.
It was also great to meet a few new people, some of which I had already chatted with online but great to put a face to a name.